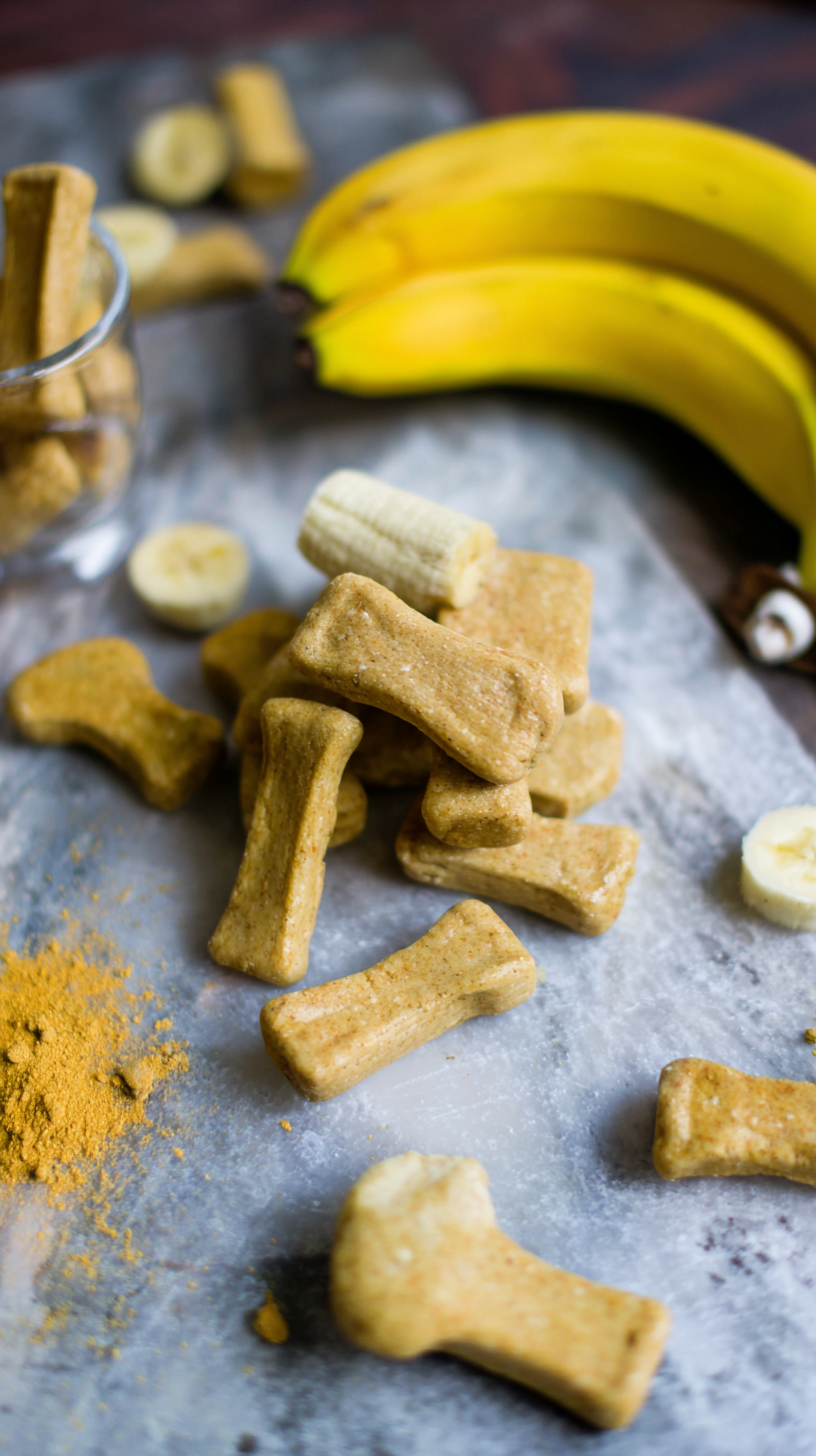
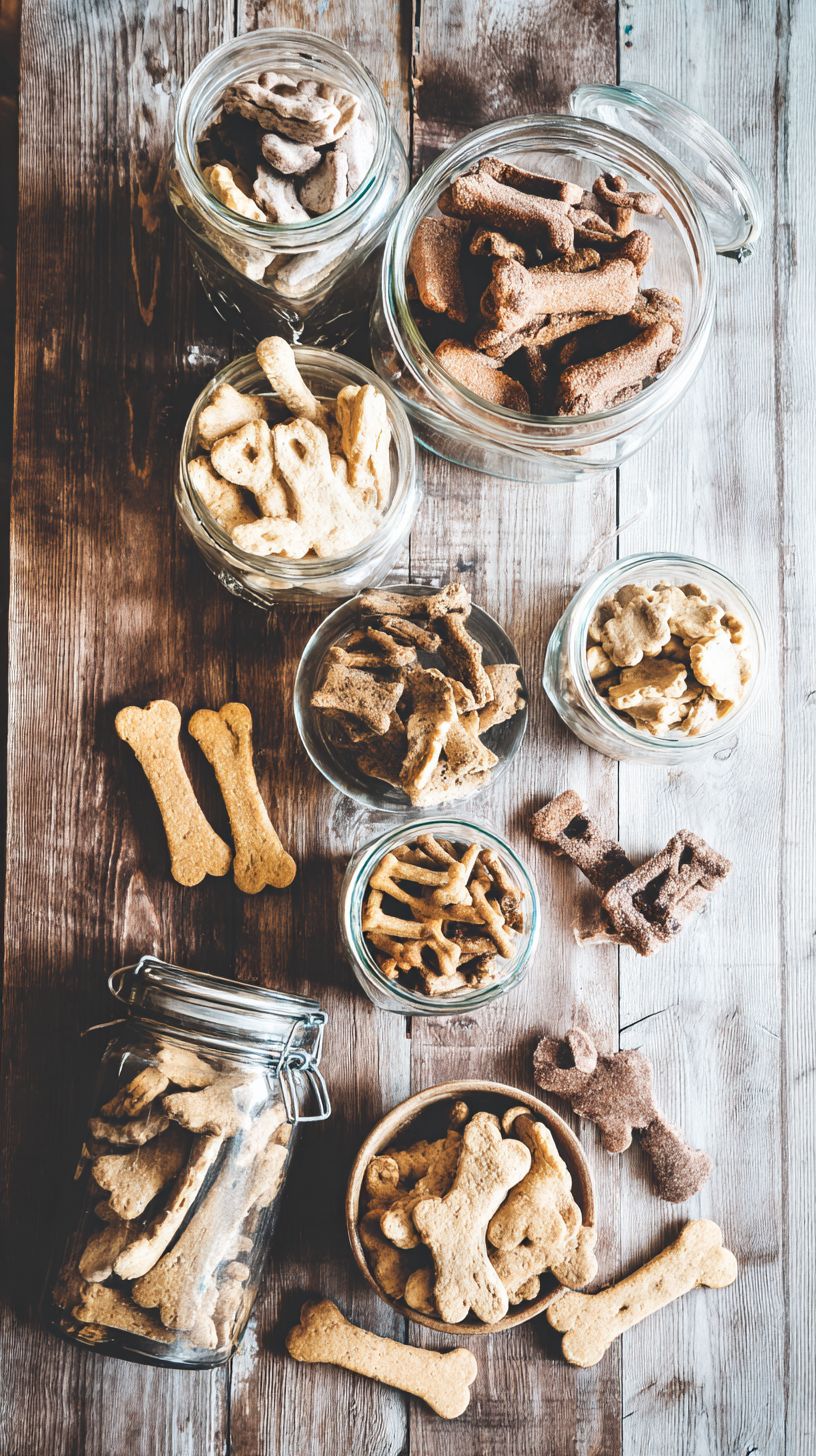
Blog

  • Nutritious Homemade Dog Food Meals: Recipes, Benefits, and Safety Tips

    The movement toward homemade dog food has gained tremendous momentum as pet owners become increasingly concerned about commercial pet food recalls, questionable ingredients, and processing methods. Making your dog’s meals from scratch allows you to control exactly what goes into their food bowl while potentially improving their health, energy levels, and overall quality of life.With proper guidance, creating balanced homemade dog food meals can be a rewarding way to nourish your furry companion. This comprehensive guide will walk you through vet-approved recipes, essential nutrients, safety considerations, and practical tips to help you confidently prepare nutritious meals your dog will love.

    A person preparing homemade dog food meals with fresh ingredients like lean meat, vegetables, and brown rice

    Benefits of Homemade Dog Food Meals

    Before diving into recipes, let’s explore why many pet owners are making the switch to homemade dog food:

    Advantages of Homemade Dog Food

    • Complete control over ingredients quality and sourcing
    • Avoidance of preservatives, fillers, and artificial additives
    • Ability to customize meals for specific health needs or allergies
    • Increased digestibility and nutrient absorption
    • Potential improvement in coat condition, energy levels, and overall health
    • Peace of mind knowing exactly what your dog is consuming

    Challenges to Consider

    • Requires careful planning to ensure nutritional balance
    • More time-consuming than commercial options
    • Needs proper storage and handling to prevent spoilage
    • May be more expensive depending on ingredients
    • Requires veterinary consultation to ensure dietary needs are met
    • Risk of nutritional deficiencies if not properly balanced

    While homemade dog food offers many benefits, it’s crucial to approach it with proper knowledge and planning. The recipes and guidelines in this article will help you navigate these challenges while maximizing the advantages for your furry friend.

    Essential Nutrients for Balanced Dog Meals

    Creating nutritionally complete homemade dog food requires understanding the essential components that make up a balanced canine diet. Unlike humans, dogs have specific nutritional requirements that must be met to maintain optimal health.

    Protein Requirements

    Dogs need high-quality protein for muscle maintenance, immune function, and overall health. Adult dogs require a minimum of 18% protein in their diet, while puppies and active dogs need 22-32%.

    Excellent protein sources include:

    • Lean ground beef, turkey, or chicken
    • Fish (salmon, sardines)
    • Eggs (an excellent complete protein)
    • Organ meats (liver, hearts, kidneys) in moderation

    Various protein sources for homemade dog food meals including lean meats, eggs, and fish

    Carbohydrates and Fiber

    While not technically essential, carbohydrates provide energy and important fiber. They should comprise about 30-70% of a dog’s diet, depending on activity level and health status.

    Healthy carbohydrate sources include:

    • Brown or white rice
    • Sweet potatoes or regular potatoes
    • Oats
    • Vegetables (carrots, green beans, peas)
    • Pumpkin (excellent for digestive health)

    Healthy carbohydrate sources for homemade dog food meals including brown rice, sweet potatoes, and vegetables

    Essential Fats

    Dogs require a minimum of 5.5% fat in their diet, with certain fatty acids being essential for skin, coat, and cellular health.

    Healthy fat sources include:

    • Fish oil (rich in omega-3 fatty acids)
    • Flaxseed oil
    • Olive oil
    • Fat naturally present in meat
    • Eggs (yolks contain beneficial fats)

    Vitamins and Minerals

    Dogs require a complex balance of vitamins and minerals that can be challenging to achieve without supplementation in homemade diets.

    Important considerations:

    • Calcium and phosphorus must be properly balanced
    • Vitamin E and selenium work together as antioxidants
    • B vitamins support energy metabolism
    • Zinc is crucial for skin and immune health
    • A veterinary-approved supplement may be necessary

    Important: Meeting AAFCO (Association of American Feed Control Officials) guidelines is essential for long-term feeding. These standards ensure your dog receives all necessary nutrients in proper proportions. Consult with a veterinary nutritionist when developing a homemade diet plan.

    Balanced Homemade Dog Food Recipes

    The following recipes have been developed with canine nutritional needs in mind. Each recipe serves as a starting point that can be adjusted based on your dog’s size, activity level, and specific health requirements. Always consult your veterinarian before making significant changes to your dog’s diet.

    Basic Balanced Beef and Rice Recipe

    This versatile recipe provides a balanced meal suitable for most adult dogs with no specific health concerns.

    Homemade dog food meal with ground beef, brown rice, vegetables, and eggs in a dog bowl

    Ingredients (makes approximately 6 cups):

    • 2 pounds lean ground beef, cooked and drained
    • 3 cups cooked brown rice (1.5 cups uncooked)
    • 2 hard-boiled eggs, chopped
    • 1.5 cups mixed vegetables (carrots, green beans, peas), chopped and lightly steamed
    • 2 tablespoons olive or safflower oil
    • 1 teaspoon calcium supplement (as recommended by your vet)
    • Multivitamin supplement (as directed by your vet)

    Preparation Instructions:

    1. Cook brown rice according to package directions and set aside.
    2. Brown ground beef in a large skillet, drain excess fat.
    3. Steam vegetables until slightly tender but still firm.
    4. Hard-boil eggs, cool, peel, and chop.
    5. In a large bowl, combine all ingredients and mix thoroughly.
    6. Allow to cool completely before serving or storing.
    7. Portion according to your dog’s weight (approximately 1/2-3/4 cup per 10 pounds of body weight per day, divided into two meals).

    Storage: Refrigerate portions for up to 3-4 days or freeze in individual containers for up to 2 months.


    Senior Dog-Friendly Turkey and Sweet Potato Recipe

    This recipe is lower in fat and phosphorus, making it suitable for senior dogs or those with early kidney concerns.

    Homemade dog food for senior dogs with ground turkey, sweet potatoes, and vegetables

    Ingredients (makes approximately 5 cups):

    • 1.5 pounds ground turkey (lean), cooked
    • 2 cups sweet potatoes, cooked and mashed
    • 1 cup cooked white rice
    • 1 cup spinach, finely chopped
    • 1/2 cup blueberries (antioxidant-rich)
    • 1 tablespoon flaxseed oil
    • 1 teaspoon calcium supplement (as recommended by your vet)
    • Senior dog vitamin supplement (as directed by your vet)

    Preparation Instructions:

    1. Cook sweet potatoes until soft, then peel and mash.
    2. Cook white rice according to package directions.
    3. Cook ground turkey thoroughly, breaking into small pieces.
    4. Finely chop spinach (raw or lightly steamed).
    5. Combine all ingredients in a large bowl and mix well.
    6. Allow to cool completely before serving.
    7. Portion according to your senior dog’s weight and activity level (generally slightly less than adult dogs).

    Storage: Refrigerate portions for up to 3 days or freeze in individual containers for up to 2 months.

    Allergy-Friendly Fish and Quinoa Recipe

    This recipe avoids common allergens like beef, chicken, dairy, and wheat, making it suitable for dogs with food sensitivities.

    Allergy-friendly homemade dog food with fish, quinoa, and vegetables

    Ingredients (makes approximately 4 cups):

    • 1.5 pounds white fish (cod, haddock, or tilapia), cooked
    • 2 cups cooked quinoa
    • 1 cup zucchini, finely diced
    • 1 cup carrots, finely diced
    • 1/4 cup fresh parsley, chopped (good for kidney health)
    • 2 tablespoons salmon oil
    • 1 teaspoon calcium supplement (as recommended by your vet)
    • Hypoallergenic vitamin supplement (as directed by your vet)

    Preparation Instructions:

    1. Cook quinoa according to package directions and let cool.
    2. Poach or bake fish until flaky, remove any bones, and break into small pieces.
    3. Steam carrots until slightly tender, then finely dice.
    4. Finely dice raw zucchini.
    5. Chop fresh parsley.
    6. Combine all ingredients in a large bowl and mix gently.
    7. Allow to cool completely before serving.
    8. Portion according to your dog’s weight and needs.

    Storage: Due to fish content, refrigerate for only 2 days or freeze in individual portions for up to 1 month.

    Feeding Guide: As a general rule, dogs should eat approximately 2-3% of their body weight in food daily, divided into two meals. Adjust portions based on your dog’s activity level, age, and weight goals. Monitor your dog’s weight and body condition regularly and adjust portions as needed.

    Safety Considerations for Homemade Dog Food

    Preparing homemade dog food requires attention to food safety and awareness of ingredients that could be harmful to your pet. Follow these guidelines to ensure your homemade meals are safe and wholesome.

    Toxic Foods to Avoid

    Never include these dangerous ingredients in your dog’s food:

    • Onions, garlic, and chives (cause hemolytic anemia)
    • Grapes and raisins (can cause kidney failure)
    • Chocolate and caffeine (toxic to dogs)
    • Xylitol (artificial sweetener highly toxic to dogs)
    • Macadamia nuts and walnuts
    • Alcohol and raw yeast dough
    • Avocado (especially the pit and skin)
    • High-salt foods


    Food Preparation Safety

    Follow these guidelines to prevent foodborne illness:

    • Wash hands thoroughly before and after handling ingredients
    • Use separate cutting boards for meat and vegetables
    • Cook all meat thoroughly to kill harmful bacteria
    • Store prepared food in airtight containers
    • Refrigerate meals promptly and use within 3-4 days
    • Freeze portions you won’t use within that timeframe
    • Thaw frozen meals in the refrigerator, not at room temperature
    • Discard any food that smells off or shows signs of spoilage

    Transitioning to Homemade Food

    When switching from commercial to homemade dog food, follow these steps:

    1. Consult your veterinarian before making any dietary changes
    2. Transition gradually over 7-10 days to prevent digestive upset
    3. Start by mixing 25% homemade food with 75% current food
    4. Gradually increase the homemade portion while decreasing the commercial food
    5. Monitor your dog for any adverse reactions during the transition
    6. Keep a food journal to track ingredients and your dog’s response

    Veterinary Consultation: Always consult with your veterinarian or a veterinary nutritionist before starting a homemade diet. They can help ensure the diet meets your dog’s specific nutritional needs and recommend appropriate supplements if necessary.

    Homemade vs. Commercial Dog Food Comparison

    Understanding the differences between homemade and commercial dog food can help you make an informed decision about what’s best for your pet.

    Factor Homemade Dog Food Commercial Dog Food
    Ingredient Quality Complete control over quality and sourcing Varies widely by brand and price point
    Nutritional Balance Requires careful planning and possible supplementation Formulated to meet minimum nutritional standards
    Preservatives None needed for fresh meals; natural options for stored meals Often contains artificial preservatives for shelf stability
    Convenience Requires time for preparation and planning Ready to serve with no preparation
    Cost Typically more expensive than basic kibble, less than premium fresh commercial options Varies widely from budget to premium options
    Customization Fully customizable for specific health needs or preferences Limited to available formulations
    Storage Requires refrigeration or freezing; shorter shelf life Shelf-stable for dry food; refrigeration for some wet foods
    Recall Risk No risk of commercial recalls Subject to occasional recalls for contamination or formulation issues

    Comparison of homemade dog food meals versus commercial dog food options

    Many dog owners find that a combination approach works well—using homemade meals as a supplement to high-quality commercial food. This provides the benefits of fresh ingredients while ensuring nutritional completeness through carefully formulated commercial options.

    Frequently Asked Questions About Homemade Dog Food

    How much does it cost to make homemade dog food?

    The cost varies depending on ingredient quality and your dog’s size. For a medium-sized dog, expect to spend -5 per day on homemade food using quality ingredients. This is typically more expensive than basic kibble but less expensive than premium commercial fresh food. Buying ingredients in bulk and preparing large batches can help reduce costs.

    How much time does it take to prepare homemade dog food?

    Initial preparation takes about 1-2 hours per batch, but most owners prepare food in bulk every 1-2 weeks. Daily serving then takes just minutes. Many find that batch cooking and freezing individual portions makes homemade feeding manageable even with busy schedules.

    How do I transition my dog from kibble to homemade food?

    Transition gradually over 7-10 days to prevent digestive upset. Start by mixing 25% homemade food with 75% kibble, then gradually increase the homemade portion while decreasing the kibble. Monitor your dog for any signs of digestive issues during the transition period and adjust the pace accordingly.

    Do I need to add supplements to homemade dog food?

    Yes, most homemade diets require supplementation to ensure complete nutrition. Calcium is particularly important, as is a balanced vitamin/mineral supplement. Work with your veterinarian to determine the specific supplements your dog needs based on their age, size, and the ingredients in your homemade recipes.

    Can puppies eat homemade dog food?

    Puppies can eat homemade food, but their nutritional needs are more specific and critical for proper development. Puppy recipes need higher protein, calcium, and calorie content. It’s especially important to consult with a veterinary nutritionist when creating homemade food for puppies to ensure proper growth and development.

    How do I know if my homemade dog food is nutritionally balanced?

    The best way to ensure nutritional balance is to work with a veterinary nutritionist who can analyze your recipes. There are also online tools and resources that can help you evaluate the nutritional content of your recipes. Regular veterinary check-ups with bloodwork can help monitor your dog’s health on a homemade diet.

    A dog enjoying a homemade meal with owner preparing food in the background

    Conclusion: Nourishing Your Dog with Homemade Meals

    Preparing homemade dog food meals can be a rewarding way to enhance your pet’s nutrition and overall wellbeing. With proper planning, consultation with veterinary professionals, and attention to nutritional balance, you can provide your dog with delicious, wholesome meals tailored to their specific needs.

    Remember that the transition to homemade food should be gradual, and ongoing monitoring of your dog’s health is essential. While it requires more time and planning than commercial options, many pet owners find the benefits—from improved digestion to increased energy and better coat condition—well worth the effort.

    Share Your Homemade Dog Food Journey

    Have you created your own homemade dog food recipes? We’d love to hear about your experiences, challenges, and successes. Share your favorite recipes, tips, or questions in the comments below to help other pet owners on their homemade dog food journey!

    Always remember that each dog is unique, with individual nutritional needs and preferences. What works wonderfully for one dog may not be ideal for another. The key is to remain flexible, observant, and responsive to your dog’s specific needs while ensuring they receive complete and balanced nutrition.

  • Homemade Banana Dog Treats Recipe

    Homemade Banana Dog Treats Recipe

    Homemade Banana Dog Treats Recipe

    These homemade banana dog treats are a healthy and tasty snack for your furry friend. Made with simple ingredients like ripe bananas, oats, and peanut butter, they are easy to prepare and sure to please your pup.

    The recipe is straightforward and requires minimal cooking skills. You can customize the treats by adding other dog-friendly ingredients like pumpkin or cinnamon.

    Why Choose Homemade Dog Treats?

    Making dog treats at home offers numerous benefits for both you and your furry companion.

    You have complete control over the ingredients, ensuring that only healthy and safe items go into your pup’s snacks.

    This is particularly important for dogs with allergies or dietary restrictions.

    Moreover, homemade treats can be tailored to your dog’s preferences.

    Whether your dog loves bananas, pumpkin, or peanut butter, you can create a recipe that caters to their taste buds.

    Ingredients You’ll Need

    For these delightful banana dog treats, you’ll need just a handful of simple ingredients.

    Start with ripe bananas, which provide natural sweetness and moisture.

    Combine them with oats for fiber and peanut butter for protein, creating a nutritious snack.

    Optionally, you can add whole wheat flour to give the treats a firmer texture.

    This can be particularly useful if you want to shape the treats into fun designs, like bones or paws.

    Preparation Steps

    The process of making these treats is straightforward and quick.

    Begin by preheating your oven to 350°F (175°C) and lining a baking sheet with parchment paper.

    This will prevent the treats from sticking and make cleanup a breeze.

    Next, mash the bananas in a mixing bowl and combine them with oats and peanut butter.

    If the mixture feels too dry, gradually add water until it reaches a dough-like consistency.

    Shaping and Baking

    Once your mixture is ready, it’s time to shape the treats.

    You can scoop out small portions and roll them into balls, or use cookie cutters to create fun shapes.

    Shaping them into bones adds a playful touch that your dog will surely appreciate!

    Place the treats on the prepared baking sheet and bake them for 15-20 minutes.

    Keep an eye on them until they turn golden brown and firm to the touch.

    Cooling and Storing

    After baking, allow the treats to cool completely on a wire rack.

    This step is crucial as it helps the treats firm up and enhances their texture.

    Once cooled, store any leftovers in an airtight container.

    These treats can last for several days, making them a convenient snack for your pup.

    Sharing with Your Furry Friend

    There’s nothing quite like the joy of watching your dog enjoy a homemade treat.

    These banana dog treats not only taste great but are also packed with nutrients that support your dog’s health.

    Next time you’re in the kitchen, consider whipping up a batch of these delightful snacks.

    Your furry friend will thank you with wagging tails and happy barks!

    Easy Banana Dog Treats Recipe

    These banana dog treats are made by mixing mashed bananas with oats and peanut butter, then baking until golden. The recipe takes about 30 minutes from start to finish and yields approximately 24 treats.

    Ingredients

    • 2 ripe bananas, mashed
    • 1 cup oats (rolled or quick oats)
    • 1/2 cup peanut butter (unsweetened and unsalted)
    • 1/4 cup water (as needed for consistency)
    • 1/2 cup whole wheat flour (optional, for a firmer texture)

    Instructions

    1. Preheat the Oven: Preheat your oven to 350°F (175°C) and line a baking sheet with parchment paper.
    2. Mix Ingredients: In a mixing bowl, combine the mashed bananas, oats, and peanut butter. Stir until well combined. If the mixture is too dry, add water gradually until it reaches a dough-like consistency.
    3. Form Treats: Scoop out small portions of the mixture and shape them into small balls or flatten them into desired shapes using cookie cutters.
    4. Bake: Place the treats on the prepared baking sheet and bake for 15-20 minutes, or until they are golden brown and firm to the touch.
    5. Cool: Allow the treats to cool completely on a wire rack before serving them to your dog. Store any leftovers in an airtight container.

    Cook and Prep Times

    • Prep Time: 10 minutes
    • Cook Time: 20 minutes
    • Total Time: 30 minutes

  • Dog Treats Homemade – Tasty & Affordable

    Dog Treats Homemade – Tasty & Affordable

    Dog Treats Homemade Peanut Butter Recipe

    These dog treats are a simple and healthy way to show your furry friend some love. Made with just a few ingredients, they are easy to prepare and can be stored for later use.

    The recipe is straightforward, requiring basic baking techniques. You can customize the treats by adding ingredients like pumpkin or oats for added nutrition.


    Creating the Perfect Dog Treats

    Making homemade dog treats is a delightful way to bond with your pet while ensuring they enjoy a healthy snack.

    With just a few simple ingredients, you can whip up a batch of peanut butter dog treats that are both nutritious and tasty.

    These treats are not only easy to prepare but also allow for customization to suit your dog’s preferences.

    Ingredients for Success

    The foundation of these treats includes whole wheat flour, peanut butter, and eggs.

    These ingredients provide a wholesome base that is both satisfying and nutritious for your furry friend.

    Optional additions like honey can enhance the flavor, while ingredients such as pumpkin or oats can boost the nutritional value.

    Step-by-Step Preparation

    Start by preheating your oven to 350°F (175°C).

    This ensures that your treats bake evenly and achieve that perfect golden brown color.

    In a large mixing bowl, combine the whole wheat flour, peanut butter, water, egg, and any optional ingredients. Mix until a dough forms, ensuring all components are well incorporated.

    These dog treats are made with whole wheat flour, peanut butter, and eggs, providing a tasty and nutritious snack for your pet. The recipe takes about 30 minutes from start to finish and yields approximately 24 treats.

    Ingredients

    • 2 cups whole wheat flour
    • 1/2 cup peanut butter (unsweetened and unsalted)
    • 1/2 cup water
    • 1 egg
    • 1 tablespoon honey (optional)

    Instructions

    1. Preheat the Oven: Preheat your oven to 350°F (175°C).
    2. Mix Ingredients: In a large bowl, combine the whole wheat flour, peanut butter, water, egg, and honey (if using). Mix until a dough forms.
    3. Roll Out Dough: On a floured surface, roll out the dough to about 1/4 inch thickness. Use cookie cutters to cut out shapes.
    4. Bake: Place the cut-out treats on a baking sheet lined with parchment paper. Bake for 15-20 minutes or until golden brown.
    5. Cool: Allow the treats to cool completely on a wire rack before serving them to your dog.

    Cook and Prep Times

    • Prep Time: 10 minutes
    • Cook Time: 20 minutes
    • Total Time: 30 minutes

    Nutrition Information

    • Servings: 24 treats
    • Calories: 50kcal per treat
    • Fat: 2g
    • Protein: 2g
    • Carbohydrates: 8g

    Shaping the Treats

    Once your dough is ready, roll it out on a floured surface to about 1/4 inch thickness.

    Using cookie cutters, cut out shapes that resemble bones or any other fun designs you prefer.

    This is a great opportunity to involve your kids or family members in the process, making it a fun activity for everyone.

    Baking to Perfection

    Place the cut-out treats on a baking sheet lined with parchment paper.

    Bake them in the preheated oven for 15 to 20 minutes, keeping an eye on them to ensure they do not overbake.

    The goal is to achieve a slightly crunchy texture that your dog will love.

    Cooling and Storing Your Treats

    After baking, allow the treats to cool completely on a wire rack.

    This step is crucial as it helps them firm up and enhances their crunchiness.

    Once cooled, you can store the treats in an airtight container, ensuring they remain fresh for your pup to enjoy later.

    Easy Peanut Butter Dog Treats Recipe

  • Beginner Friendly 2 Ingredient Dog Treats Anyone Can Make

    Beginner Friendly 2 Ingredient Dog Treats Anyone Can Make

    There are nights when I barely have the energy to cook dinner, yet Henry still expects his special goodies. This recipe was created on one of those days. With only three ingredients and one mixing bowl, you can make a treat that will delight your pup.

    This quick bake is our go‑to for road trips, grooming rewards or whenever Henry is being extra cute.


    Beginner Friendly 2 Ingredient Dog Treats Anyone Can Make

    Soft and chewy with no special equipment required, these treats come together quickly.


    Ingredients

    • 1 cup oat flour or finely ground rolled oats.

    • ½ cup unsweetened, xylitol‑free peanut butter.

    • ¼ cup water (add more as needed).

    Instructions

    1. Preheat the oven to 350 °F (175 °C).

    2. Combine all ingredients in a bowl and stir until the dough is sticky.

    3. Shape the dough into balls or press into small discs.

    4. Place the shapes on a lined baking sheet.

    5. Bake for 14–18 minutes until the edges are firm.

    6. Let the treats cool completely before serving.

    Optional add‑in: Mash 1 tablespoon of banana or sprinkle in a pinch of cinnamon for extra flavor.

    Why These Treats Are Better Than Store‑Bought

    If you’re looking to add nutrition without fillers, homemade snacks have clear advantages.

    Ingredient Benefit
    Peanut butter Offers protein and healthy fats when xylitol‑free
    Oat flour Gentle on digestion and naturally gluten‑free
    Water Adds moisture without unnecessary fillers


    Storage & Shelf Life Tips

    • Keep the treats in an airtight container at room temperature for 5–6 days

    • Refrigerate for up to 10 days

    • Freeze for up to 3 months


    Troubleshooting

    • Too dry to roll? Add a splash more water or peanut butter.

    • Too soft after baking? Give them a few extra minutes in the oven

    • Too hard for older pups? Mix in mashed banana or roll the dough thinner

    • Sticky dough? Lightly dust your hands with oat flour before shaping.

    Price Comparison – Homemade vs. Store‑Bought

    Treat type Store‑bought (10 treats) Homemade (10 treats)
    Basic peanut‑butter treats $8.99 $1.45


    Final Thoughts – Homemade Love in Every Bite

    Sometimes the simplest recipes become favorites. This one comes together quickly, uses pantry staples and turns into pure dog joy. Every time I grab the jar of peanut butter, Henry eagerly watches; now you have a recipe to bring that same excitement to your kitchen.

  • Banana and Peanut Butter Chew Sticks for Dogs: Easy Homemade Recipe

    Banana and Peanut Butter Chew Sticks for Dogs: Easy Homemade Recipe

    Looking for a wholesome, long-lasting treat that will keep your furry friend happily occupied? These banana and peanut butter chew sticks for dogs combine two canine-favorite flavors into a delightful, chewy treat that’s perfect for rewarding good behavior or simply showing your pup some extra love. Unlike store-bought options loaded with preservatives and mystery ingredients, these homemade chew sticks contain only natural, dog-safe components you can feel good about giving to your four-legged family member.

    What makes these treats special is their perfect balance of nutrition and enjoyment. Bananas provide essential potassium and vitamins, while natural peanut butter offers healthy fats and protein. The best part? You can create these delicious chew sticks using ingredients you likely already have in your pantry, making them an affordable alternative to expensive commercial treats!

    Ingredients for Banana and Peanut Butter Chew Sticks

    These chew sticks use simple, wholesome ingredients that are beneficial for your dog’s health. Bananas are rich in potassium and vitamin B6, while natural peanut butter provides protein and healthy fats that support your dog’s energy levels and coat health.

    Ingredients for banana and peanut butter chew sticks laid out on a kitchen counter

    Basic Ingredients:

    • 2 ripe bananas (mashed)
    • 1 cup natural peanut butter (xylitol-free)
    • 2 cups oat flour (or whole wheat flour)
    • 1/2 cup unsweetened applesauce

    Optional Add-ins:

    • 1 tablespoon honey (for extra binding and sweetness)
    • 1/4 cup ground flaxseed (for added omega-3 fatty acids)
    • 1 egg (for extra protein and binding)
    • 1/2 teaspoon cinnamon (for flavor and anti-inflammatory benefits)


    Step-by-Step Instructions

    Creating these banana and peanut butter chew sticks is straightforward and requires minimal baking experience. The process takes about 15 minutes of preparation and 25-30 minutes of baking time, resulting in delicious treats your dog will adore.

    Mixing banana and peanut butter in a bowl for dog chew sticks
    1. Preheat your oven to 350°F (175°C) and line a baking sheet with parchment paper for easy cleanup.
    2. Mash the bananas in a large mixing bowl until smooth. Very ripe bananas work best as they’re easier to mash and naturally sweeter.
    3. Add the peanut butter to the mashed bananas and mix thoroughly until well combined. Make absolutely certain your peanut butter does not contain xylitol, as this sweetener is extremely toxic to dogs.
    4. Stir in the applesauce until the mixture has a uniform consistency. This adds moisture and helps bind the ingredients together.
    5. Gradually add the oat flour, mixing well after each addition until a stiff dough forms. The dough should be firm enough to hold its shape but still pliable.
    6. If using any optional add-ins, fold them into the dough now. The egg will make the treats slightly crispier, while flaxseed adds nutritional benefits.
    7. Transfer the dough to a lightly floured surface and roll it out to approximately 1/4 inch thickness.
    8. Cut the dough into stick shapes approximately 4-5 inches long and 1/2 inch wide. You can use a pizza cutter or knife for this step.
    9. Place the sticks on the prepared baking sheet, leaving a small gap between each to allow for even baking.
    10. Bake for 25-30 minutes or until the sticks are firm and golden brown. For chewier treats, bake for less time; for crunchier treats, bake longer.
    11. Allow the treats to cool completely on the baking sheet before serving to your dog.

    Safety Tip: Always check your peanut butter label carefully to ensure it does NOT contain xylitol (sometimes listed as “birch sugar”). This artificial sweetener is extremely toxic to dogs and can cause liver failure, even in small amounts.

    Recipe Variations:

    1. Grain-Free Version: Substitute oat flour with coconut flour or almond flour (use about 1/2 the amount as these flours absorb more moisture).
    2. Extra-Protein Sticks: Add 2 tablespoons of unflavored protein powder or replace applesauce with plain Greek yogurt.
    3. Pumpkin Power: Substitute half the banana with pure pumpkin puree (not pie filling) for added fiber and vitamin A.
    4. Dental Health Boost: Add 1 tablespoon of finely chopped fresh parsley or mint to help freshen your dog’s breath.
    Cutting banana and peanut butter dough into stick shapes on a floured surface

    Serving Suggestions & Storage

    These banana and peanut butter chew sticks are versatile treats that can be served in various ways depending on your dog’s preferences and needs. Here’s how to serve and store them for maximum freshness and enjoyment.

    Serving Ideas:

    • Size appropriately: For small dogs (under 15 lbs), break the sticks in half. Medium dogs can enjoy a full stick, while larger breeds might enjoy two at a time.
    • Training rewards: Break into smaller pieces for high-value training treats that won’t crumble in your pocket.
    • Stuffed toys: Place a stick inside a hollow rubber toy for extended playtime that exercises your dog’s mind.
    • Frozen option: For teething puppies or hot days, freeze the sticks for 2-3 hours before serving for a cooling, soothing treat.
    • Special occasions: Arrange several sticks in a star pattern on a plate for a festive birthday “cake” alternative.

    Storage Instructions:

    • Room temperature: Store in an airtight container for up to 5 days. This maintains the chewy texture most dogs prefer.
    • Refrigerator storage: Keep in an airtight container for up to 2 weeks. The sticks will become slightly harder but still chewy.
    • Freezer storage: Place in a freezer-safe container with parchment paper between layers to prevent sticking. Treats will stay fresh for up to 3 months.
    • Thawing: If frozen, allow treats to thaw at room temperature for about 30 minutes before serving for the best texture.


    Nutritional & Safety Notes

    While these banana and peanut butter chew sticks are made with dog-friendly ingredients, it’s important to understand their nutritional benefits and serve them in moderation as part of a balanced diet for your canine companion.

    Health Benefits:

    • Bananas provide potassium, vitamin B6, and fiber for digestive health
    • Natural peanut butter contains healthy fats, protein, and vitamin E
    • Oat flour offers complex carbohydrates and is generally well-tolerated by dogs with sensitivities
    • Applesauce adds moisture, vitamin C, and natural sweetness
    • Flaxseed (if used) provides omega-3 fatty acids for coat health and inflammation reduction

    Important Safety Notes:

    • Always use xylitol-free peanut butter as this sweetener is extremely toxic to dogs
    • Introduce gradually if your dog hasn’t had these ingredients before
    • Monitor calorie intake as treats should make up no more than 10% of daily calories
    • Adjust serving size based on your dog’s weight and activity level
    • Consult your veterinarian before introducing new treats if your dog has health conditions

    Substitutions for Dogs with Allergies or Sensitivities:

    Ingredient Allergy Concern Substitution
    Peanut Butter Peanut sensitivity Sunflower seed butter or pumpkin puree
    Oat Flour Grain sensitivity Coconut flour (use half the amount) or chickpea flour
    Applesauce Apple sensitivity Mashed sweet potato or pumpkin puree
    Egg (optional) Egg allergy 1 tablespoon ground flaxseed mixed with 3 tablespoons water

    Warning: While all ingredients in this recipe are generally safe for dogs, every dog is unique. Some dogs may have individual sensitivities or allergies to certain foods. Always introduce new treats gradually and monitor your dog for any adverse reactions such as itching, digestive upset, or changes in behavior. If you notice any concerning symptoms after giving these treats, discontinue use and consult your veterinarian.

    Frequently Asked Questions

    Here are answers to common questions about making and serving banana and peanut butter chew sticks for dogs.

    Can I freeze these banana and peanut butter chew sticks?

    Yes, these chew sticks freeze exceptionally well. After baking and cooling completely, place them in a freezer-safe container with parchment paper between layers to prevent sticking. They’ll stay fresh for up to 3 months in the freezer. Freezing actually makes them last longer during chewing sessions, which is perfect for aggressive chewers or for cooling relief on hot days. Allow frozen treats to thaw for about 30 minutes before serving, or give them directly from the freezer for a refreshing cold treat in summer months.

    Are bananas safe for dogs to eat?

    Yes, bananas are generally safe and healthy for dogs when given in moderation. They’re packed with potassium, vitamins, biotin, fiber, and copper. They’re also low in cholesterol and sodium, making them a healthier treat option compared to many commercial alternatives. However, bananas do contain sugar, so they should be given as an occasional treat rather than a daily staple, especially for dogs with diabetes or weight issues. The high fiber content can also cause digestive upset if too much is consumed at once, so start with small portions when first introducing bananas to your dog’s diet.

    What kind of peanut butter is safe for dogs?

    When selecting peanut butter for dog treats, always choose varieties that contain only peanuts and perhaps a small amount of salt. The most important thing is to ensure the peanut butter does NOT contain xylitol (also listed as “birch sugar”), which is extremely toxic to dogs and can cause liver failure even in small amounts. Avoid peanut butters with added sugars, oils, or artificial sweeteners. Natural, unsweetened peanut butter is best. Some brands specifically market pet-safe peanut butter, but regular human peanut butter is fine as long as you check the ingredients carefully. Organic options are good choices as they avoid pesticides and other chemicals.

    How often can I give my dog these chew sticks?

    These banana and peanut butter chew sticks should be given as occasional treats, not as regular meal replacements. A good rule of thumb is to limit treats to no more than 10% of your dog’s daily caloric intake. For most dogs, this means 1-2 chew sticks 2-3 times per week is appropriate. Small dogs should receive fewer or smaller treats, while larger, more active dogs can have slightly more. If your dog has health conditions like diabetes, obesity, or food sensitivities, consult with your veterinarian for specific recommendations. Always adjust your dog’s regular food portions on days when you provide treats to maintain a healthy weight.

    Can I make these treats grain-free for my dog?

    Absolutely! To make grain-free banana and peanut butter chew sticks, simply substitute the oat flour with coconut flour, almond flour, or chickpea flour. Keep in mind that coconut and almond flours absorb more moisture than grain-based flours, so you’ll need to use approximately half the amount (about 1 cup instead of 2). You may need to adjust the consistency by adding a bit more applesauce if the dough becomes too dry. Another excellent grain-free option is to use sweet potato flour or green pea flour, which both provide good binding properties. Always introduce new ingredients gradually, as some dogs may have sensitivities to certain grain alternatives.

    Grain-free banana and peanut butter chew sticks made with coconut flour on a cooling rack

    Healthy Homemade Happiness: Treats Your Dog Will Love

    Creating banana and peanut butter chew sticks for your dog is more than just a fun kitchen project—it’s an act of love that provides your furry companion with wholesome, nutritious treats free from artificial preservatives and mystery ingredients. These simple chew sticks combine the natural sweetness of bananas with the protein-rich goodness of peanut butter to create a treat that’s not only delicious but also offers genuine health benefits.

    Whether you’re rewarding good behavior, providing a distraction during stressful times, or simply showing your pup some extra love, these homemade chew sticks are sure to earn you plenty of tail wags and appreciative licks. The best part is knowing exactly what goes into your dog’s treats, giving you peace of mind about what your beloved pet is consuming.

    Remember to introduce these treats gradually, especially if your dog hasn’t had bananas or peanut butter before, and always serve in moderation as part of a balanced diet. With these simple precautions in mind, you and your furry friend can enjoy the rewards of homemade treat-making together—one delicious banana and peanut butter chew stick at a time!

  • Frozen Watermelon Dog Treats: Easy Summer Recipe for Your Pup!

    Frozen Watermelon Dog Treats: Easy Summer Recipe for Your Pup!

    When summer temperatures soar, our furry friends need cooling relief just as much as we do. These frozen watermelon dog treats offer the perfect solution – they’re refreshing, hydrating, and packed with nutrients that are beneficial for your canine companion. Made with just a few simple ingredients, these icy delights will have your pup’s tail wagging with excitement while helping them beat the heat!Unlike commercial treats filled with preservatives and artificial ingredients, these homemade frozen watermelon treats contain only natural components that are safe and healthy for dogs. The best part? You can whip up a batch in minutes using ingredients you likely already have in your kitchen!

    Ingredients for Frozen Watermelon Dog Treats

    These refreshing treats use dog-safe ingredients that provide both flavor and hydration. Watermelon is naturally sweet and contains vitamins A and C, which are beneficial for your dog’s immune system and vision health.

    Ingredients for frozen watermelon dog treats laid out on a counter

    Basic Ingredients:

    • 2 cups seedless watermelon, cubed (rind removed)
    • 1/2 cup plain Greek yogurt (unsweetened)
    • 1 tablespoon dog-safe peanut butter (xylitol-free)

    Optional Add-ins:

    • 1/4 cup blueberries (for extra antioxidants)
    • 1/2 banana, sliced (for added creaminess)
    • 1 tablespoon coconut oil (for healthy fats)
    • 1 tablespoon honey (for extra sweetness, if needed)


    Step-by-Step Instructions

    Creating these frozen watermelon dog treats is incredibly simple. The process takes just minutes of active preparation, and your freezer does the rest of the work!

    Blending watermelon chunks in a food processor for dog treats
    1. Prepare the watermelon by removing all seeds and rind. The white part of the rind and any seeds can be difficult for dogs to digest, so be thorough in this step.
    2. Cut the watermelon into small cubes that will blend easily. You’ll need about 2 cups of cubed watermelon flesh.
    3. Place the watermelon chunks in a food processor or blender and pulse until you have a smooth puree. If you don’t have a food processor, you can mash very ripe watermelon with a fork.
    4. Add the Greek yogurt and peanut butter to the watermelon puree and blend again until all ingredients are well combined.
    5. If using any optional add-ins like blueberries or banana slices, fold them into the mixture now. For blueberries, you can leave them whole or lightly pulse them in the food processor.
    6. Pour the mixture into silicone molds, ice cube trays, or small paper cups. Leave a small space at the top as the mixture will expand slightly when frozen.
    7. If desired, add a dog biscuit to each mold to serve as a “handle” once frozen. This makes the treats easier for your dog to hold and enjoy.
    8. Place in the freezer for at least 4-6 hours, or until completely frozen.

    Safety Tip: Always check that your peanut butter does NOT contain xylitol (also listed as “birch sugar”), as this sweetener is extremely toxic to dogs even in small amounts.

    Variations to Try:

    1. Watermelon-Cucumber Coolers: Replace half the watermelon with cucumber for an extra-hydrating treat.
    2. Berry Blast: Add a handful of dog-safe berries like blueberries or strawberries for added antioxidants.
    3. Tropical Delight: Mix in small pieces of pineapple (in moderation) for a tropical twist.
    4. Yogurt Swirl: After pouring the watermelon mixture into molds, swirl in a spoonful of plain yogurt for a marbled effect.
    Pouring watermelon mixture into silicone paw-shaped molds

    Serving Suggestions & Storage

    These frozen watermelon treats are perfect for hot summer days when your dog needs cooling refreshment. Here’s how to serve and store them properly.

    Serving Ideas:

    • Size matters: Serve appropriate portions based on your dog’s size. Small dogs (under 20 lbs) should have mini-sized treats, while larger dogs can enjoy standard ice cube-sized portions.
    • Outdoor treat: Serve these treats outside to avoid any potential mess from melting treats.
    • Training reward: Use tiny frozen treats as high-value rewards during summer training sessions.
    • Puzzle time: Place treats in a puzzle toy for mental stimulation along with cooling relief.
    • Birthday celebration: Arrange several treats on a plate with a dog biscuit “candle” for a dog birthday celebration.

    Storage Instructions:

    • Freezer storage: Keep treats in the freezer in an airtight container for up to 2 months.
    • Separation: If not using silicone molds, place treats on a parchment-lined tray to freeze initially, then transfer to a container once solid to prevent sticking.
    • Labeling: If you make different variations, label containers so you know which treats contain which ingredients.
    • Serving from frozen: Always serve treats completely frozen, never partially thawed, to avoid messiness.


    Nutritional & Safety Notes

    While these frozen watermelon dog treats are made with dog-friendly ingredients, it’s important to understand their nutritional benefits and serve them in moderation as a special treat rather than a regular part of your dog’s diet.

    Health Benefits:

    • Watermelon is 92% water, making it excellent for hydration
    • Vitamins A and C in watermelon support immune health and vision
    • Greek yogurt provides protein and probiotics for gut health
    • Peanut butter offers healthy fats and protein in small amounts
    • Blueberries (if used) add antioxidants and phytochemicals

    Important Safety Notes:

    • Remove all seeds and rind from watermelon before processing
    • Check peanut butter to ensure it contains NO xylitol
    • Use only plain, unsweetened yogurt without artificial sweeteners
    • Serve in moderation as treats should make up no more than 10% of daily calories
    • Introduce gradually if your dog has never had these ingredients before

    Substitutions for Dogs with Allergies or Sensitivities:

    Ingredient Allergy Concern Substitution
    Greek Yogurt Dairy sensitivity Coconut yogurt (unsweetened) or skip entirely
    Peanut Butter Peanut allergy Pumpkin puree or mashed banana
    Honey Sugar sensitivity Omit completely (watermelon is naturally sweet)
    Blueberries Berry sensitivity Small pieces of apple (seeds removed) or cucumber

    Warning: While watermelon flesh is safe for dogs, the rind can cause gastrointestinal upset and the seeds could cause intestinal blockage. Always thoroughly remove all seeds and rind before preparing these treats. If your dog shows any signs of digestive distress after eating these treats, discontinue use and consult your veterinarian.

    Frequently Asked Questions

    Here are answers to some common questions about making and serving frozen watermelon dog treats.

    Various frozen watermelon dog treats in different shapes and sizes

    Is watermelon safe for all dogs?

    Yes, the flesh of watermelon is safe for most dogs when served properly. It’s important to completely remove all seeds and rinds, as these parts can cause digestive issues or intestinal blockage. The flesh itself is mostly water and contains beneficial vitamins. However, as with any new food, introduce watermelon gradually to your dog’s diet and watch for any adverse reactions. Dogs with diabetes should have watermelon only in very small amounts due to its natural sugar content.

    How long do frozen watermelon dog treats last?

    When stored properly in an airtight container in the freezer, these treats can last up to 2 months. However, for the best quality and flavor, try to use them within 3-4 weeks. If you notice any freezer burn or ice crystals forming on the treats, they’re still safe for your dog to eat but might be less appealing. Always keep the treats frozen until right before serving, as they melt relatively quickly, especially in hot weather.

    Can I make these treats without a food processor?

    Absolutely! While a food processor makes the process quicker and creates a smoother texture, you can make these treats without one. For a no-equipment method, choose very ripe watermelon and mash it thoroughly with a fork or potato masher until it reaches a pulpy consistency. Then stir in the yogurt and other ingredients by hand. The texture will be chunkier than processor-made treats, but most dogs will enjoy the added texture. You can also use a blender, immersion blender, or even a mixer as alternatives.

    How many frozen watermelon treats can my dog have in a day?

    Treats should make up no more than 10% of your dog’s daily caloric intake. For these watermelon treats specifically, small dogs (under 20 lbs) should have no more than 1-2 small treats per day. Medium dogs (20-50 lbs) can have 2-3 medium-sized treats, while large dogs (over 50 lbs) might have up to 3-4 treats daily. On very hot days, you can offer an extra treat for hydration, but be mindful of the total amount. If your dog has health conditions like diabetes or is overweight, consult with your veterinarian about appropriate portions.

    What are the best molds to use for frozen dog treats?

    Silicone molds work best for frozen dog treats because they’re flexible, making it easy to pop out the frozen treats without breaking them. Dog-themed silicone molds in shapes like paws or bones are fun but not necessary. Standard ice cube trays work perfectly well. For small dogs, consider using mini ice cube trays or candy molds for appropriately sized treats. If you don’t have any molds, small paper cups or a lined muffin tin can work too. Just peel away the paper once frozen. Regardless of the mold type, spraying with a tiny amount of coconut oil before filling can help with easy removal.

    Dog-themed silicone molds filled with watermelon mixture ready for freezing

    Cool Treats for Hot Dogs: Summer Relief in Every Bite

    Creating homemade frozen watermelon dog treats is more than just a fun summer activity—it’s a wonderful way to provide your furry friend with a healthy, hydrating snack when temperatures rise. These simple treats combine the refreshing qualities of watermelon with the nutritional benefits of yogurt and other dog-friendly ingredients to create something special that your pup will absolutely love.

    Whether you’re celebrating your dog’s birthday, rewarding good behavior, or simply helping them cool down on a hot day, these frozen watermelon treats are sure to earn you plenty of tail wags and sloppy kisses. The best part? You can feel good knowing you’re providing a wholesome, natural treat without any artificial ingredients or preservatives.

    Remember to always introduce new foods gradually, serve treats in moderation, and adjust portions based on your dog’s size and dietary needs. With these simple precautions in mind, you and your furry friend can enjoy a refreshing summer together, one frozen watermelon treat at a time!

  • Peanut Butter and Banana Dog Cake: A Tasty & Healthy Treat for Your Pup!

    Peanut Butter and Banana Dog Cake: A Tasty & Healthy Treat for Your Pup!

    Nothing says “I love you” to your furry best friend quite like a homemade treat made especially for them. This peanut butter and banana dog cake combines two ingredients dogs absolutely adore into one celebration-worthy dessert that’s both delicious and nutritious. Packed with potassium from bananas and protein from peanut butter, this simple cake is perfect for dog birthdays, adoption anniversaries, or just because your good boy or girl deserves something special!

    Unlike human cakes loaded with sugar and artificial ingredients, this dog-friendly version uses wholesome components that are safe and beneficial for your canine companion. The best part? You probably already have most of these ingredients in your pantry, and the recipe comes together in just minutes!

    Ingredients for Peanut Butter and Banana Dog Cake

    This simple recipe uses dog-safe ingredients that provide both flavor and nutrition. Always check your peanut butter label to ensure it doesn’t contain xylitol, which is toxic to dogs.

    Ingredients for peanut butter and banana dog cake laid out on a counter

    For the Cake:

    • 2 ripe bananas, mashed
    • 1/2 cup unsweetened natural peanut butter (xylitol-free)
    • 1/3 cup coconut oil
    • 2 tablespoons honey (optional for added sweetness)
    • 1 1/2 cups whole wheat flour (or oat flour for grain-sensitive dogs)
    • 1 teaspoon baking soda
    • 1/2 cup water

    For the Frosting:

    • 1 cup plain unsweetened yogurt (regular or Greek)
    • 1/4 cup peanut butter
    • 1/2 banana (optional, for extra flavor)

    Step-by-Step Instructions

    Making this peanut butter and banana dog cake is simple and straightforward. The process is similar to making a human cake, just with dog-friendly ingredients!

    Mixing the peanut butter and banana dog cake batter in a bowl
    1. Preheat your oven to 350°F (175°C) and prepare a 6-inch round cake pan by lightly greasing it with coconut oil.
    2. In a large bowl, mash the bananas until smooth. A few small lumps are fine – your dog won’t mind!
    3. Add peanut butter, coconut oil, and honey to the mashed bananas and mix well until combined.
    4. In a separate bowl, whisk together the flour and baking soda.
    5. Gradually add the dry ingredients to the wet ingredients, alternating with water, and stir until just combined. Be careful not to overmix.
    6. Pour the batter into your prepared cake pan and smooth the top with a spatula.
    7. Bake for 25-30 minutes or until a toothpick inserted in the center comes out clean.
    8. Allow the cake to cool completely before removing from the pan. This is important – hot cake can burn your dog’s mouth!

    Safety Tip: Always let the cake cool completely before serving to your dog. Hot food can burn their sensitive mouths!

    For the Frosting:

    1. In a medium bowl, mix the yogurt and peanut butter until smooth and well combined.
    2. If using banana in the frosting, mash half a banana until very smooth and stir into the yogurt mixture.
    3. Once the cake has cooled completely, spread the frosting over the top and sides.
    4. Refrigerate the frosted cake for at least 30 minutes before serving to allow the frosting to set.
    Frosting the peanut butter and banana dog cake with yogurt frosting

    Serving Suggestions & Storage

    Your furry friend will be wagging their tail in anticipation once they smell this delicious cake! Here’s how to serve and store it properly.

    Dog looking excitedly at a slice of peanut butter and banana cake

    Serving Ideas:

    • Size matters: Serve appropriate portions based on your dog’s size. Small dogs (under 20 lbs) should have a small slice (about 1/8 of the cake), medium dogs (20-50 lbs) can have 1/6 of the cake, and larger dogs can enjoy up to 1/4 of the cake in one sitting.
    • Special touch: Add a dog biscuit on top as a candle alternative for birthday celebrations.
    • Make it festive: Use a small amount of natural food coloring in the yogurt frosting (like beet juice for pink) to make it more festive.
    • Mini cakes: For multiple dogs, bake the batter in a muffin tin to create individual “pupcakes.”

    Storage Instructions:

    • Refrigeration: Store leftover cake in an airtight container in the refrigerator for up to 3 days.
    • Freezing: Cut into individual portions and freeze for up to 2 months. Thaw a slice in the refrigerator overnight when ready to serve.
    • Unfrosted storage: If you haven’t frosted the entire cake, you can store the frosting separately in the refrigerator for up to 5 days.


    Nutritional & Safety Notes

    While this peanut butter and banana dog cake is made with dog-friendly ingredients, it’s still important to serve it in moderation as a special treat rather than a regular part of your dog’s diet.

    A healthy peanut butter and banana dog cake with nutritional ingredients displayed

    Health Benefits:

    • Bananas provide potassium, vitamin C, and fiber
    • Peanut butter offers protein and healthy fats
    • Yogurt contains probiotics that support digestive health
    • Whole wheat flour provides fiber and nutrients

    Important Safety Notes:

    • Always check that your peanut butter does NOT contain xylitol, which is toxic to dogs
    • Serve in moderation as treats should make up no more than 10% of your dog’s daily caloric intake
    • Monitor your dog after introducing any new food
    • Consult your vet if your dog has specific dietary restrictions or health concerns

    Substitutions for Dogs with Allergies or Sensitivities:

    Ingredient Allergy Concern Substitution
    Peanut Butter Peanut allergy Sunflower seed butter or pumpkin puree
    Whole Wheat Flour Grain sensitivity Oat flour or coconut flour
    Yogurt Dairy sensitivity Coconut yogurt (unsweetened)
    Honey Sugar sensitivity Omit completely (the bananas provide natural sweetness)

    Warning: If your dog has never had these ingredients before, introduce small amounts first to ensure they don’t have an adverse reaction. When in doubt, consult with your veterinarian.

    Frequently Asked Questions

    Here are answers to some common questions about making and serving peanut butter and banana dog cake.

    Dog enjoying a slice of peanut butter and banana cake

    Can I freeze this peanut butter and banana dog cake?

    Yes! This cake freezes beautifully. Cut it into individual portions, wrap each piece in parchment paper, and store in a freezer-safe container for up to 2 months. Thaw a slice in the refrigerator overnight before serving to your pup. Frozen slices can also make refreshing treats during hot summer days!

    Are bananas safe for dogs?

    Yes, bananas are safe for most dogs in moderation. They’re packed with potassium, vitamins, and fiber. However, they do contain natural sugars, so they should be given as an occasional treat rather than a daily food. If your dog has diabetes or weight issues, consult with your vet about appropriate portion sizes.

    What kind of peanut butter should I use for my dog’s cake?

    Always use unsweetened, natural peanut butter with no added salt, sugar, or artificial sweeteners. Most importantly, check the ingredient list to ensure it does NOT contain xylitol (also listed as “birch sugar” or “wood sugar”), which is extremely toxic to dogs even in small amounts. Brands like Smucker’s Natural, Crazy Richard’s, or fresh-ground peanut butter from health food stores are typically good options.

    How often can my dog eat this cake?

    This cake should be considered a special treat, not a regular part of your dog’s diet. While the ingredients are dog-safe, the cake is calorie-dense. Small dogs should have no more than a small slice once a month, while medium to large dogs could potentially have a slice every few weeks. Always adjust portions based on your dog’s size, activity level, and any health considerations.

    Can I make this recipe grain-free?

    Absolutely! For a grain-free version, substitute the whole wheat flour with either coconut flour (use 1/2 cup instead of 1 1/2 cups as coconut flour is highly absorbent) or almond flour (use the same amount as whole wheat). You can also use chickpea flour as a 1:1 substitute. Each alternative will change the texture slightly, but your dog will still love it!

    Two-tier peanut butter and banana dog cake decorated for a dog birthday

    Celebrate Your Furry Friend with Homemade Love

    There’s something special about making a homemade treat for your four-legged family member. This peanut butter and banana dog cake is more than just a delicious dessert—it’s a way to show your pup how much you care. Whether you’re celebrating a birthday, adoption anniversary, or just want to spoil your best friend, this simple recipe is sure to earn you plenty of wet kisses and tail wags!

    Dog with peanut butter and banana cake with birthday hat

    Remember to always serve treats in moderation and adjust portions based on your dog’s size and dietary needs. The joy on your pup’s face when they get their very own special cake will be worth every minute spent in the kitchen!

    Share Your Pup’s Cake Experience!

    Did you make this peanut butter and banana dog cake for your furry friend? We’d love to see photos of your pup enjoying their special treat! Tag us on social media or share in the comments below.

  • Carrot & Pumpkin Dog Snack Sticks

    Carrot & Pumpkin Dog Snack Sticks

    Homemade Carrot & Pumpkin Snack Sticks for Dogs 🥕🎃

    If you love spoiling your pup with healthy treats, these Carrot & Pumpkin Snack Sticks are a must-try! They’re nutritious, easy to make, and free from preservatives — plus, they’ll have your dog’s tail wagging the second they come out of the oven.

    Perfect for Pinterest pet parents who want wholesome, DIY dog treats that double as a bonding activity.

    Why Make Dog Treats at Home?

    Homemade dog treats aren’t just about spoiling your furry friend — they’re about giving them the best:

    • Control the ingredients – No artificial colors, flavors, or preservatives.

    • Allergen-friendly – Skip common irritants like wheat, dairy, or soy.

    • Nutritious and balanced – Add vitamins, minerals, and fiber that support digestion, coat health, and immunity.

    Ingredients for Carrot & Pumpkin Snack Sticks

    • 1 cup pure pumpkin puree (NOT pumpkin pie filling)

    • 1 cup grated carrots (about 2 medium carrots)

    • 2 cups oat flour (blend rolled oats until fine)

    • 1 egg (optional for binding — skip if sensitive)

    • 1 tbsp coconut oil or water

    Why they’re healthy:

    • Carrots – Rich in vitamin A, great for eyes, teeth, and digestion.

    • Pumpkin – High fiber for healthy digestion, plus skin and coat benefits.

    • Oat flour – Gluten-free, gentle on sensitive stomachs.

    Step-by-Step: How to Make Them

    1. Preheat oven to 350°F (175°C) and line a baking sheet with parchment paper.
    2. Mix wet ingredients – Combine pumpkin, carrots, and egg in a large bowl.
    3. Add oat flour gradually, mixing until a dough forms.
    4. Adjust texture – Add coconut oil or water if too dry; add more oat flour if too sticky.
    5. Shape sticks – Roll dough into ½-inch-thick sticks (shorter for small dogs).
    6. Bake for 25–30 mins until golden and firm. For crunchier sticks, let them cool in the oven with the heat off.
    7. Cool completely on a wire rack before serving.

    Storage Tips

    • Fridge – Airtight container, up to 1 week.

    • Freezer – Up to 3 months; thaw before serving.

    Fun Variations

    • Peanut Butter Boost – Add 2–3 tbsp natural peanut butter (no xylitol).

    • Berry Blast – Fold in a handful of blueberries for antioxidants.

    • Sweet Potato Swap – Replace carrots with grated sweet potato for a softer chew.

    Troubleshooting

    • Too Sticky? Add more oat flour, 1 tbsp at a time.

    • Too Soft? Bake 5–10 mins longer or let them crisp in the oven as it cools.

    • Dog Dislikes Carrot? Swap for zucchini or sweet potato.

  • Pumpkin & Oatmeal Dog Snack Sticks

    Pumpkin & Oatmeal Dog Snack Sticks

    Pumpkin & Oatmeal Dog Snack Sticks – A Healthy, Homemade Treat for Your Pup

    Few things compare to the joy of making your own dog treats. The wagging tail, the eager eyes, and the happy crunching sound make every minute worthwhile. These Pumpkin & Oatmeal Dog Snack Sticks are a simple, nutritious alternative to store-bought snacks, which often contain unnecessary fillers or preservatives.

    This easy recipe blends wholesome ingredients like pumpkin, oats, and peanut butter into a chewy, flavorful stick your dog will love — whether they’re a playful pup or a gentle senior.

    Why Make Your Own Dog Treats?

    Homemade treats give you full control over the ingredients, ensuring every bite is safe and beneficial for your furry friend.

    Here’s why this recipe is a winner:

    • Pumpkin: High in fiber, vitamins A & C, and beta-carotene to aid digestion and boost immunity.
    • Oatmeal: Gentle on sensitive stomachs and provides long-lasting energy.
    • Peanut butter: A tasty, protein-rich addition — just make sure it’s xylitol-free.

    By making these at home, you’re not just offering a snack — you’re giving your dog a treat made with care.

    Ingredients

    • 1 cup pure pumpkin puree (unsweetened, no spices)
    • 2 cups oat flour (make by blending rolled oats until fine)
    • ½ cup unsweetened applesauce
    • 1 tbsp natural peanut butter (xylitol-free)
    • ½ tsp cinnamon (optional)


    Tip: Always check labels to ensure there are no harmful additives, especially in peanut butter.

    Instructions

    1. Preheat & Prep
      Heat oven to 350°F (175°C). Line a baking sheet with parchment paper or a silicone mat.
    2. Mix Wet Ingredients
      In a large bowl, combine pumpkin, applesauce, and peanut butter. Stir until smooth.
    3. Add Dry Ingredients
      Slowly mix in oat flour and cinnamon. Stir until the dough is thick and slightly sticky. If it’s too wet, add more oat flour one tablespoon at a time.
    4. Shape the Sticks
      Roll small portions into sticks about 4–5 inches long and ½ inch thick. For even sizes, cut them with a knife after rolling.
    5. Bake
      Place sticks on the baking sheet with space between them. Bake for 20–25 minutes until firm and lightly golden at the edges.
      • For a softer chew: remove a couple of minutes early.
      • For crunchier sticks: bake 5 minutes longer.
    6. Cool Completely
      Transfer to a wire rack and let cool before serving.


    Storage Tips

    Since these treats are preservative-free, store them properly:

    • Fridge: Airtight container, up to 1 week.
    • Freezer: Up to 3 months. Thaw before serving or give frozen as a refreshing summer treat.


    Variations & Add-Ins

    • Blueberry Boost – Add fresh blueberries for antioxidants.
    • Banana Swap – Replace pumpkin with mashed banana for a sweeter twist.
    • Crunchy Version – Bake at a lower temp for longer to dehydrate.
    • Fun Shapes – Roll out and use cookie cutters for bones, hearts, or paws.

    Why Pumpkin Is a Dog Superfood

    Pumpkin isn’t just for autumn — it’s a year-round health booster:

    • Aids digestion – Helps with both diarrhea and constipation.
    • Strengthens immunity – Packed with vitamins A & C.
    • Supports weight control – Low calorie, high fiber.


    Final Thoughts

    Making these Pumpkin & Oatmeal Dog Snack Sticks is more than just baking — it’s a way to bond with your dog and give them a healthy, homemade treat they’ll truly enjoy.

    Next time your dog deserves a reward, skip the store-bought snacks and try this recipe. You’ll get happy tail wags, and they’ll get a delicious, wholesome bite every time.

  • Golden Retriever: The Complete Guide for First-Time Owners

    Golden Retriever: The Complete Guide for First-Time Owners


    🐾 Hero: Why You Need This Guide

    The Golden Retriever is among the UK’s most beloved breeds and it’s easy to see why. Bred as a gundog, this large, gentle companion has an intelligence and friendliness that make it both a working dog and an unrivalled family pet. This guide explores everything you need to know — from choosing the right type of Golden Retriever and understanding its temperament to grooming, exercise, health, training and costs. By the end you’ll know whether a Golden Retriever is the right dog for your lifestyle and how to give your new friend the happiest life possible.


    Introduction: Why the Golden Retriever Matters

    Golden Retrievers have become a symbol of canine companionship. Developed in the Scottish Highlands by Lord Tweedmouth in the 19th century, the breed was created by crossing the now‑extinct yellow Wavy‑Coated Retriever with the Tweed Water Spaniel. Those early dogs excelled at retrieving game on both land and water and their friendly nature quickly endeared them to hunters and families alike. Modern Goldens are still renowned for their kind, confident temperament and have gone on to excel as guide dogs, therapy dogs and search‑and‑rescue dogs. Their popularity also makes them one of the most commonly researched breeds online. This article answers the most frequently asked questions and provides practical information for first‑time owners in the UK.

    Are Golden Retrievers good family dogs?


    Yes. Goldens are famously gentle and sociable. They love children and generally get along with other pets. Their eager‑to‑please attitude also makes them adaptable to family life.

    These athletic dogs require plenty of physical and mental stimulation. Adults typically need at least 1–2 hours of exercise per day, split into morning and evening walks. Puppies need shorter, frequent sessions so as not to damage growing joints.

    Yes. Goldens have a medium‑length, water‑resistant double coat that sheds year‑round. Expect heavier shedding in spring and autumn. Regular brushing (at least twice weekly) helps manage loose hair.

    No. Because they shed and produce dander, Goldens are not considered hypoallergenic. People with dog allergies may react to this breed.

    Golden Retrievers are classed as large dogs. Adults typically stand 53–61 cm (21–24 in) at the shoulder and weigh 25–34 kg (55–75 lb). Males are usually larger than females.

    With good care, the breed’s average life expectancy is 10–12 years. British‑type Goldens may live slightly longer (around 12 years 3 months).

    Goldens are generally healthy but can suffer hip and elbow dysplasia, progressive retinal atrophy (PRA), hypothyroidism, hot spots and atopic dermatitis, certain eye conditions (including pigmentary uveitis and PRA) and a higher risk of cancers such as lymphoma and hemangiosarcoma. Responsible breeders screen their breeding stock for many of these issues.

    Yes. Their intelligence and desire to please make Goldens highly trainable. However, their friendly nature can make them excitable or distracted when young, so training should begin early with positive reinforcement and consistent commands.

    Initial costs vary. A pedigreed puppy in the UK typically costs £500–£2,000 depending on pedigree and breeder reputation, while adoption fees are usually lower. Annual expenses include food (£200–£700), grooming (£100–£500), veterinary care (£100–£1,000), insurance (£200–£600), training (£50–£500), accessories/toys (£50–£200) and boarding (£100–£300). Battersea estimates it costs around £2,000 per year to care for a dog.

    Attribute

    American Golden

    Canadian Golden

    British/English Golden

    Build

    Leaner frame

    Taller with a slightly thinner frame

    Stockier, blockier head

    Coat colour

    Dark golden to light golden

    Generally darker, sometimes reddish

    Thick, wavy coat; sometimes marketed as “English Cream”

    Coat texture

    Medium length, dense undercoat; sheds heavily

    Thinner coat than American type

    Longer, coarse coat; larger body and heavier bone; tail curls over the back; usually brown eyes

    Typical height (male/female)

    58–61 cm / 53–56 cm

    Similar to American (approx. 58–61 cm / 53–56 cm

    56–61 cm / 50–56 cm

    Temperament

    Friendly, responsive; can be exuberant

    Similar to American; affectionate and energetic

    Often described as slightly calmer and more mellow

    Notes

    Widely seen in the UK and US; bred for show and field work

    Less common; sometimes imported; coat darker

    Also known as English Cream; reputed to have marginally longer lifespan

    Is the Golden Retriever Right for You? Lifestyle Match Checklist

    Use this quick checklist to see whether a Golden Retriever fits your lifestyle:

    • You enjoy an active lifestyle – You can commit to at least 1–2 hours of exercise daily.
    • You like social dogs – Goldens thrive on human interaction and are happiest in busy households.
    • You have time for grooming – Regular brushing and occasional baths are required.
    • You’re OK with some mess – They shed year‑round.
    • You can invest in training – Early socialisation and positive training are essential.
    • You have enough space – A house with a secure garden is ideal.
    • You’re prepared for long‑term costs – Expect annual expenses of around £2,000.

    If most of these bullets resonate, the Golden Retriever could be a perfect fit for your home.

    Temperament and Personality

    General Temperament

    Golden Retrievers are famed for their kind, friendly and confident nature. They are social butterflies who love meeting people and other animals. This friendliness stems from their history as gundogs — they needed to work closely with people and other dogs in the field. As a result, aggression is rare; instead, Goldens greet strangers with wagging tails and enjoy being involved in family activities. Their intelligence and desire to please mean they’re quick learners. However, that same exuberance can lead to over‑enthusiasm, particularly in puppies and adolescents. Careful training and consistency help channel this energy into good behaviour.

    Family & Children

    Goldens make outstanding family pets. They are gentle with children and usually patient with clumsy toddlers. Their large size means supervision is still important: an excited Golden can accidentally knock over small children during play. Teaching both dog and children to interact respectfully prevents problems. Because of their social nature, Goldens generally coexist happily with other dogs and even cats when introduced properly.

    Socialisation & Barking

    While not known for excessive barking, Golden Retrievers will alert you to visitors or unusual noises. Early socialisation is essential to prevent fearfulness and to ensure they remain confident in different situations. Enrolling in puppy classes and exposing your puppy to various people, animals and environments will help them grow into a well‑rounded adult. A well‑socialised Golden is unlikely to develop aggression or serious behavioural issues.


    Grooming Requirements

    Coat & Shedding

    The Golden’s medium‑length double coat is both beautiful and demanding. An outer layer of water‑repellent hair protects against rain and mud, while the soft undercoat provides insulation. This combination means they shed continuously. The heaviest shedding occurs in spring and autumn as the undercoat “blows” in preparation for seasonal temperature changes.

    Brushing & Baths

    To manage shedding and prevent matting, brush your Golden at least twice a week with a slicker brush and metal comb. During heavy shedding seasons, daily brushing may be necessary. Bathing should be occasional — roughly every six to eight weeks — using a dog‑specific shampoo. Over‑bathing can strip essential oils from their coat, leading to dry skin.

    Ear Care & Health

    Goldens have floppy ears that can trap moisture, making them prone to ear infections. Inspect and clean the outer ear gently once or twice a week using a vet‑approved cleaner. Keep nails trimmed and teeth brushed regularly. Routine grooming sessions also provide an opportunity to check for lumps, bumps or skin problems such as hot spots or atopic dermatitis.


    Exercise & Activity Needs

    Daily Walks & Play

    Golden Retrievers were bred for endurance and retrieving; their exercise needs reflect this heritage. Adults require 1–2 hours of exercise each day. This can include brisk walks, jogging, hiking, swimming and games like fetch or tug. Many Goldens make excellent running partners. They also love the water — swimming provides an excellent, low‑impact workout that’s gentle on joints.

    Mental Stimulation

    Physical exercise alone isn’t enough for this intelligent breed. Goldens thrive on mental challenges. Puzzle toys, scent games, obedience training, hide‑and‑seek and agility courses keep their minds active. Without adequate mental stimulation they may become bored and develop destructive behaviours.

    Training & Intelligence

    Golden Retrievers rank among the most trainable dogs. Their high intelligence and strong desire to please mean they quickly understand commands and enjoy learning. Positive reinforcement — using treats, toys or praise to reward desired behaviour — is the most effective training method. Consistency is critical; use the same words for each command and keep sessions short and engaging. Early socialisation and training classes will help your dog learn to focus amidst distractions. Keep training varied to prevent boredom. Adolescent Goldens may test boundaries; patience and continued reinforcement are key.

    Health & Lifespan

    Overview and Longevity

    Golden Retrievers are typically robust dogs with an average lifespan of 10–12 years. British‑type Goldens may live slightly longer. Regular veterinary care and responsible breeding (including health screening) help ensure a long, healthy life. Common health issues include:

    • Hip and elbow dysplasia – developmental disorders of the joints that cause pain and arthritis. Responsible breeders screen parents and puppies; maintaining a lean weight and providing appropriate exercise can reduce symptoms.
    • Progressive retinal atrophy (PRA) – an inherited eye disease leading to blindness. Genetic testing helps identify carriers.
    • Hypothyroidism – reduced thyroid hormone production causing weight gain, lethargy and skin problems. Managed with daily medication.
    • Skin conditions – including hot spots and atopic dermatitis, which cause itching and infections.
    • Eye conditions – such as pigmentary uveitis and cataracts.
    • Cancers – particularly lymphoma and hemangiosarcoma; Golden Retrievers have a higher risk than many breeds.
    • Heart disease – subaortic valvular stenosis is a genetic heart defect seen in some lines.

    Regular veterinary check‑ups, genetic testing and preventive measures can help manage these conditions.

    Vet Care & Preventive Screening

    When purchasing a puppy, ask to see hip and elbow scores for both parents, eye test results and any DNA test certificates. In the UK, the Kennel Club recommends screening breeding dogs for hip and elbow dysplasia, PRA and other genetic conditions. Annual veterinary exams and vaccinations, parasite control and dental checks are essential. Report any signs of lameness, vision problems, skin lesions or unusual lumps promptly.


    Training Tips & Intelligence

    House Training & Obedience

    Begin training early. Golden Retriever puppies learn house rules quickly when given frequent opportunities to eliminate outside and consistent praise for doing so. Start with basic commands such as sit, down, come and stay and practise them daily. Use positive reinforcement; harsh corrections can damage trust and are rarely needed with this breed.

    Young Goldens may be mouthy, jumping up or chewing. Redirect chewing to appropriate toys and reward calm greetings. Crate training can help with house training and provides a safe place when you’re away. Stay patient during adolescence; continue reinforcement and keep sessions fun.

    Socialising & Enrichment

    Expose your puppy to diverse people, places, sounds and experiences from a young age. Puppy classes offer controlled socialisation and teach good manners. Provide puzzle feeders, scent games and obedience exercises to keep your Golden mentally engaged. Rotating toys and teaching tricks will channel their intelligence and prevent boredom.


    Diet & Nutrition

    Healthy Diet

    Goldens are omnivores and need a complete, balanced diet that meets all their nutritional requirements. PDSA recommends buying commercially prepared foods labelled “complete” and approved by UK Pet Food so you can be confident the food meets nutritional standards. Choose a life‑stage appropriate food (puppy, adult, senior) and feed according to the manufacturer’s guidelines. Goldens have a soft mouth and often enjoy both kibble and wet foods; you can feed either or a mix as long as portion sizes are adjusted accordingly.

    Weight Management

    Goldens are prone to obesity. Offer high‑quality animal proteins (chicken, beef, fish) and avoid fillers such as corn, soy or wheat, which provide little nutritional value. Foods enriched with Omega‑3 fatty acids support joint health. Control portion sizes and avoid free‑feeding; consistent meal times help regulate digestion and weight. Always provide fresh water.

    Feeding Schedule

    Puppies require three to four small meals per day, while adult Goldens usually do well on two meals. Watch your dog’s body condition and adjust portions to maintain a lean, athletic build. Treats should be used sparingly as training rewards and counted towards daily calorie intake. Consult your vet if you have concerns about diet, allergies or weight management.


    Suitable Living Environment

    Indoor vs Outdoor

    Goldens were bred to work closely with humans and do not thrive living outdoors alone. They require regular human contact and should sleep inside with their family. A secure garden is ideal for play, but they should not be left unsupervised for long periods. In the home, they need space — a small flat may feel cramped for a large, energetic dog; a house with access to outdoor space is preferable.

    Weather Considerations

    Thanks to their dense, water‑repellent double coat, Goldens cope well with cold and wet conditions. In hot weather they shed their undercoat to help keep cool. Even so, heatstroke is a risk; always provide shade, plenty of fresh water and avoid vigorous exercise during hot afternoons. Conversely, in winter, their thick coat helps them stay warm during frosty walks. If temperatures plunge below freezing, limit time outside and monitor for signs of discomfort. Goldens adapt well to different climates provided they live indoors and have proper care.

    Cost of Owning a Golden Retriever

    Initial Costs

    • Puppy purchase: In the UK, a well‑bred Golden Retriever puppy usually costs between £500 and £2,000 depending on pedigree, health clearances and breeder reputation. Puppies with top show or working lines can cost more.
    • Adoption fees: Rehoming from a rescue or breed‑specific charity is often more affordable. Adoption fees typically cover vaccinations, microchipping and neutering.
    • Essential equipment: You’ll need a crate (£35–£75 depending on size), lead, harness, collar and ID tag, food and water bowls, bed (£20–£75), grooming tools and puppy toys.
    • Initial veterinary costs: Puppy vaccinations (around £70) and microchipping (approx. £15).

    Ongoing Expenses

    • Food: £200–£700 per year depending on quality and your dog’s size.
    • Grooming: Professional grooming and supplies cost £100–£500 per year. DIY grooming reduces costs but takes time.
    • Routine veterinary care: Annual check‑ups, vaccinations and parasite treatments range from £100 to £1,000 per year. Emergency treatments can be costly; pet insurance helps manage unexpected bills.
    • Insurance: Comprehensive policies cost around £200–£600 per year. Premiums increase with age and breed‑specific health risks.
    • Training: Group classes or one‑to‑one sessions may cost £50–£500 per year.
    • Accessories and toys: Budget £50–£200 annually for toys, leads, enrichment items and replacing worn‑out gear.
    • Boarding or pet‑sitting: Holidays and work trips mean you’ll need pet care. Expect £100–£300 per year.

    Overall, Battersea estimates a minimum of £2,000 per year to cover ongoing costs for an average dog. Budgeting for these expenses ensures you can provide the best care throughout your dog’s life.

    Key Takeaways

    • Origins & History: The Golden Retriever was developed in 19th‑century Scotland by crossing the yellow Wavy‑Coated Retriever with the Tweed Water Spaniel.
    • Size & Appearance: A large breed standing 53–61 cm tall and weighing 25–34 kg. They have a medium‑length double coat that sheds heavily.
    • Temperament: Friendly, intelligent and eager to please; excellent with children and other pets. Early socialisation prevents fearfulness.
    • Exercise Needs: Require 1–2 hours of daily exercise and mental stimulation.
    • Grooming: Need regular brushing and occasional baths to manage shedding; floppy ears require routine cleaning.
    • Health: Average lifespan is 10–12 years. Screening and responsible breeding reduce risks of hip and elbow dysplasia, PRA, hypothyroidism and cancers.
    • Costs: Initial purchase ranges £500–£2,000 with annual upkeep around £2,000.

    Conclusion

    Golden Retrievers embody the best qualities of man’s best friend. Their origins as loyal gundogs have shaped an affectionate temperament, a strong work ethic and a love for human companionship. For first‑time owners in Britain, understanding the breed’s needs — from exercise and grooming to health care and financial commitment — ensures that you and your Golden enjoy a harmonious relationship. Whether you choose an American‑style Golden, a darker Canadian or a creamy English type, you’ll be rewarded with unwavering loyalty and countless joyful moments. If you’re ready for an active, sociable dog who thrives on your company, the Golden Retriever may be the perfect addition to your family. Have you owned a Golden? Share your experiences or questions in the comments – we’d love to hear your stories!